Saturday, April 29, 2017

Snapping Monsters Stamps: Release of My Third Stamp Set

Today I'm pleased to announce the release of my third stamp set: Wonder Girls!  It's available in my Etsy shop, Snapping Monsters, and is selling for $15 a set plus shipping. The stamp set is unmounted red rubber and is a combo of girl sketches, faux stitching, circles, X's, numbers and sentiments.  

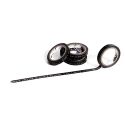
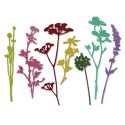
Here are some examples of what I've made with the stamps.  The first girl is sporting a side braid.  I used one of the faux stitches stamp to make the flower stems.


Here's the same girl with a red riding hood vibe:


The next girl has a stylish up-do.  Here she is on a notebook cover:


And here's the same girl with a plain background and saucy blue hair!  I used watercolors and Brusho crystals on her and the X's, circles and "Lovely You" sentiment are also part of the stamp set.


Next up is this pigtail girl, which I had a lot of fun with.


And here she is in a different color palette.  The crown is part of the set and can be added to any of the girls' heads.  "Be the good" is also a sentiment from this set.


Last but certainly not least is this girl with wild hair and freckles.  "Wonder girl" also comes with the stamp set.


Here she is again, along with edging made with the faux stitch stamps.


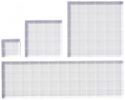
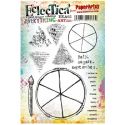
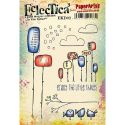
Here are all of the images in the stamp set- as stamped on an 8.5" x 11" piece of paper. For size reference, each girl head measures between 3" and 4.5" tall and the longest strip of faux stitching is just under 6" long.


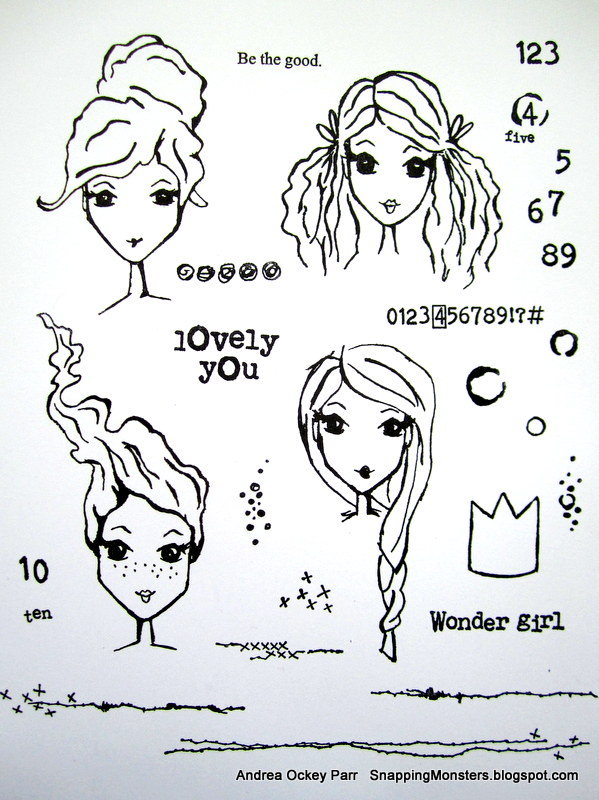
And here is the stamp set itself, which has all of these images on a 6" x 9" sheet of deep-etched red rubber.


I tried to make the images versatile, since versatility is something I always look for in the stamp sets I  buy.  I also made the girl heads good-sized so that any one of them could be the center of a card without having to add anything else.  A simple triangle-shape can make a dress for them or you can leave them as is.  I've had lots of fun experimenting with these images and hope that you enjoy them, too!


Monday, April 24, 2017

My Other Creations: Altered Board Book Ephemera File

No one has to twist my arm to "put a number on it," which is this week's Simon Says Stamp Monday Challenge theme.  While math is my eternal nemesis, I do love numbers in an artistic sense.  For my project, I altered a board book by turning it into a folder to hold ephemera.  


My toddler has a special talent for destroying board books (my librarian side has to take calming Yoga breaths when I see that this has happened).  So I decided to take a broken board book and break it further.  I cut all the inside pages out, which left a hollow folder shell.  I traced the cover of the board book onto Strathmore Mixed Media paper so I'd have the correct size of cover art to make.  Then I made a collage out of patterned paper, Washi tape and paint.


I added blue and black paint around the edges.


I added a bit more white here and there and then glued on the decorative elements.  Then I got ready to glue my cover onto the broken-open board book (which you can see behind my cover).


Onto decorating the inside!  More collaging.  This is the inside left page...


And here's the inside right cover.  On this side, I punched holes and inserted eyelets so that I could lace some elastic ribbon through.  I used two strips of elastic ribbon to be able to hold my ephemera in place.


And here's how it looks in action as it holds some scraps and cards and paper pieces:


At the end of the day, my librarian self felt heroic for saving a broken book and my artsy self is excited to have a place to stash more stuff.


Here are the supplies I used that you can find at Simon Says Stamp:


I'm sure you will find all sorts of easy ways to "put a number on it" this week, so be sure to upload your creations to the Simon Says Stamp Monday Challenge Blog for your chance to win a $50 voucher to the Simon Says Stamp store.

And speaking of Simon, if you're in the Ohio area this weekend, don't forget that Simon Says Stamp is having its fabulous Create event.  The tickets to the event have sold out, but they will have an on-site store and wonderful "create and takes" that are ready to go!


And it's always good to shop 24/7 online at Simon Says Stamp, too!

Monday, April 17, 2017

My Cards and Tags: Cards Made with Dylusions Ink

This week's Simon Says Stamp Monday Challenge is "Splash it On."  I made a background using Dylusions Ink Sprays and water, which I cut into rectangles and made into a set of cards.


I started with Strathmore Mixed Media Paper, which I think holds up nicely to lots of wet stuff. I sprayed on a variety of Dylusions Ink Sprays, then sprayed water on top of the ink spray to make it blend and drip down my page.


As my ink spray started to dry, I added a few layers of white paint smears on top.  When the ink and paint was completely dry, I glued on some text paper in torn strips and circles.


I added more white paint and a ring die from Seth Apter.  I added some paint to areas where there wasn't enough.


The last step for my background page was to add some white texture paste through stencils (Tim Holtz's Bubble stencil and Simon Says Stamps' Falling Snow stencil).


Once my background page was done, I cut it into smaller rectangles and then decorated each one.  On the card pictured below, I used a tree stamp (Paper Artsy: Kim Dellow EKDO2) and a wonky circle stamp from Simon Says Stamp's Sparkle & Shine set.  I also added some Washi tape from Doodlebug and Illustrated Faith.


On the next card, I used a Tim Holtz Wildflowers die and some patterned paper scraps.  The months are from a Paper Artsy stamp set (Everything Art EEA03) and the building is from a Tim Holtz Cityscape Skyline die.


On this card, I used a Spellbinders die (Orange You a Tomato), some patterned paper (Bo Bunny's Believe) and some Illustrated Faith Washi tape.


This card was made with the Tim Holtz Cityscape Skyline dies, patterned paper scraps, Washi tape from Doodlebug and a swirlie circle die from Reverse Confetti.


The next card is accented with patterned paper (Cool Kid by Crate Paper) and a part of a photo I took of an awesome retro turquoise van.


The last card also uses the Tim Holtz Cityscape Skyline dies, Doodlebug Washi tape and patterned paper scraps.


It's always a good sign when your workspace is a scattered mess and there are inky paper towels and your own painty fingers everywhere.  These cards were a lot of fun and reminded me of why I love the bright juicy colors of Dylusions Ink Sprays!

Here are the supplies I used that you can find at Simon Says Stamp:


I am excited to see how you "splash it on" this week!  Upload your creations to the Simon Says Stamp Monday Challenge Blog to inspire the rest of us and be entered to win the $50 gift voucher to the Simon Says Stamp store!