Monday, February 27, 2017

My Other Creations: Altered Rolodex-like Book File

I am indeed an English major geek of the highest order, so I was totally excited to see this week's Simon Says Stamp Monday Challenge theme of "Based on a Book."  Why not make a project where the book is the actual base?  So here is my altered Rolodex-ish file made out of a book.


As a person who was taught to never ever fold the pages of books, this was a morally-challenging challenge!  I started with a big book (1200+ pages) of American poetry (forgive me Whitman!!)  I seriously felt pain and guilt with each fold, but then I thought, what better book to have at my fingertips, even if it took on a new shape?  Surround me with literary greats in one form or another and I feel inspired.


This is the first time I've made this type of structure, so I'm by no means an expert at doling out advice, but here's what I did.  I started in the middle of the book and took a section of 5-6 pages. I looped the section in half toward the spine. (Disclaimer!  I forgot to take process pics early-on, so the next couple of pictures are of a totally different book just to show my process).


I tucked the section into the spine as tightly as I could.


Then I folded the section flat and repeated that process about fifty thousand times (it actually wasn't that bad!).  I alternated so that I'd fold a few sections to the left of the center section I started with, then I would fold a few sections to the right of the center section.  Working on it from both sides kept things more even. 


Here it is (picture flipped vertically) when it was done:


Once I had my structure in place, I took patterned paper and started making files/dividers using rectangular dies and the We R Memory Keepers Tab Punch Board and a great little die from Penny Black called Tabs and Toggles.


Once I had my files made, I started putting everything into the book.  The pages held things nicely!  If you wanted thinner book sections, you could certainly fold fewer pages at a time, but I liked the look of the chunkier sections.


I scribbled down some ideas and techniques on some of the file cards and then I started putting in some of my finished cards and tags.  I'm always running out of wall space to display things I've made, so I thought this was a great alternate location.  So it contains tricks and tips and some of my former projects.  I thought it could be an "inspiration station" of sorts.


At the end of the day, this held A LOT of goodies and it's nice to have all of these notes and projects in one centralized location.  And hopefully this project doesn't get me black-balled within the librarian community!  This book does look pretty happy in my craft room, though, right?  So I'm hoping that means all will be forgiven!


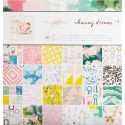
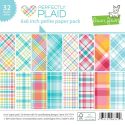
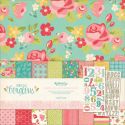
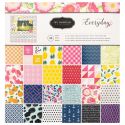
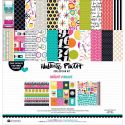
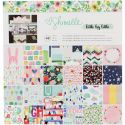
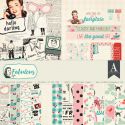
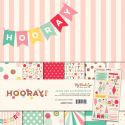
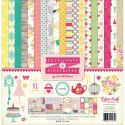
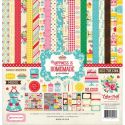
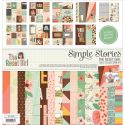
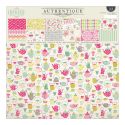
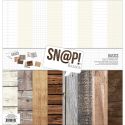
Maybe I should've called this the "everything but the kitchen sink" project because I used a lot of paper from different collections.  Here are the supplies I used that you can find at Simon Says Stamp:

I am seriously excited to see how you are inspired by books this week!  Be sure to upload your creations to the Simon Says Stamp Monday Challenge Blog for your chance to win a $50 voucher to the Simon Says Stamp store!


Saturday, February 25, 2017

My Cards and Tags: Blue-Haired Beauty

I seem to be obsessed with blue hair lately.  At the end of the day, I suppose there are worse things to be obsessed with.


This girl's head is from a stamp called Pigtails.  I made her a dress and a crown and created a painty-themed background for her. The lovely loopy "Create" sentiment is from Simon Says Stamp.  The cool pattern on the purple pieces in back is from a Spellbinders embossing folder (designed by the talented Seth Apter) called Maze.  All the other stamps (circles and splats and "dot, dot, dot" words) are from the stamp set I designed called Artistic Essentials.  I made her dress out of some Recollections paper called "Mixed Media," which I painted over and added a bit of color to.

I started out by making a watercolor background that looked like a paint box.  


Next I glued on some paint-themed text from an old home improvement book. 


From there it was just a matter of fussy-cutting the stamped images, and layering, and combining them all onto the background.


Thanks for swinging by and happy crafting to all of us this weekend!

Wednesday, February 22, 2017

My Cards and Tags: Blessed Card Using Reverse Confetti

I was in a bit of a gray mood today (gray sky, wet gray sidewalks, general overall gray vibes), but then I got to thinking Hey!  At least I'm not one of those worms that got washed out of house and home and is now on the sidewalk awaiting a worse fate.  I felt bad for those little guys and was grateful to be a human.  That led to me thinking of other things I was grateful for and before long, I was feeling much less gray.  My feelings of gratitude inspired this card, the structure of which was based on February's SFYTT over at Reverse Confetti.


I started with some paper from Altenew's Reflections scrapbook kit, then added some text paper on top, some of it cut with Tim Holtz's Trellis Frameworks die.

  
I toned it down with some white paint and did more ink blending, then added a Reverse Confetti frame made out of blue paper from their Fright Night collection.  The "Blessed" die is also from them.  I made a tree out of another Reverse Confetti die and added some hearts to it.  I stamped around the tree with a wonky stitched circle from Simon Says Stamp's Sparkle and Shine set.


I had some Teresa Collins number/bingo Washi tape that I added to represent counting blessings and typed out the "count the ways" sentiment on my We R Memory Keepers typewriter.

Here are the supplies I used:


It felt good to stop and think about all there is to be grateful for- including the opportunity to be crafty!