Sunday, March 29, 2015

My Other Creations: Pastel Notebook

This week's challenge at the Simon Says Stamp Monday Challenge Blog is to embrace pastels!  Love the shabby-chic look you get with them and this is the perfect time of year to think of the soft colors of Easter.  I created a notebook for my project with a subtly-colored cover:


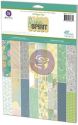
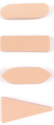
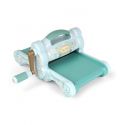
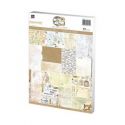
I started out with a Journal Kit from We R Memory Keepers that comes with pages, spiral wire for binding, and a cover.  You need a Cinch tool to assemble it, but I love how all it leaves for you to do is to spiff it up.  So I went with some paper from Prima's Free Spirit collection as my cover base.  I used a Layered Bead stencil and Distress Ink in Spun Sugar, Shabby Shutters and Cracked Pistachio to make some faded circles in the background.


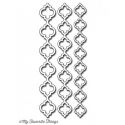
Next I added some die strips that I cut with the Moroccan Tiles die and smudged with Spun Sugar and Tumbled Glass Distress Ink.


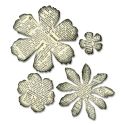
You know I'm a fabric-a-holic, so I grabbed the Tattered Florals die and cut out some fabric flowers to layer onto my cover.  The trick to getting dies to cut through fabric is to add a piece of cardstock to the die "sandwich" so that there's enough pressure to cut through fabric.  My die sandwich went as follows: bottom plate, die, fabric, cardstock, top plate.  Worked great!  You'll notice, too, that I used not just the flower shapes, but also the square "frames" that I cut the flowers out of.


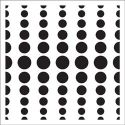
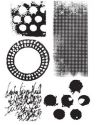
I whipped out some white acylic paint and stamped on some reverse polka dots using Dina Wakley's Textures stamp, then smudged more white paint here and there.  Love the look of using paint with stamps, but I always have to clean my stamps pronto so the paint isn't stuck there for life (kind of obsessive about keeping my stamps as "mint" as possible).


I'm really loving the Scribbles die, so I cut out a few circular scribbles using Prima's Lifetime paper and added them to the side.


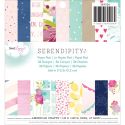
The Serendipity paper stack has a piece of patterned paper consisting of a bunch of words, so I cut some of the words out and used them on the cover and on the tabs of my journal.  I also smeared more Distress Ink here and there with a sponge.


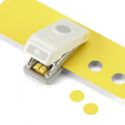
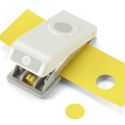
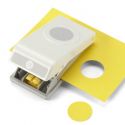
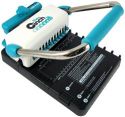
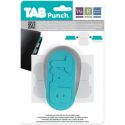
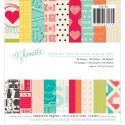
I glued my creation onto my journal chipboard cover, then bound the whole thing together with the Cinch.  The kit includes four pocket/divider pages, which I always attach tabs to.  I made the tabs using We R's tab punch and paper from both Shimelle and Serendipity.


You can never have too many notebooks (says the former English teacher) and I thoroughly enjoyed this week's pastel theme.

Here are the materials I used, which you can find at Simon Says Stamp:


I know  you're feelin' the pastel vibes this week, so show us your creations!  Upload your pastel pieces to the Simon Says Stamp Monday Challenge Blog so that we can see the clever things you've been up to and so that you'll be automatically entered into the Simon Says Stamp drawing for a $50 store voucher!


http://www.simonsaysstamp.com/

Saturday, March 28, 2015

My Cards and Tags: Small Things with Great Love

I'm feelin' the bright happy polka dot love today as the weather is Springy and some crocuses have poked their little heads through the dirt adding some much needed color to the landscape.  I'll be heading out for a neighborhood stroll as soon as I finish this post.

I made this card with a handful of fantastic stamps from 100 Proof Press:


I started by stamping a circle over and over with Ranger Jet Black Archival ink, then smeared various shades of Distress Ink inside each circle using a sponge. I painted the background in between the circles with some watercolors and let them do their drip-i-di-do action.  I stamped this girl image, called Lucy in the Sky, onto white paper and colored her with Distress Inks.  I added some text to her dress with a great stamp called Week Ending, then fussy-cut her out.  I made wings for her using the fins of the Life-Size Bluegill stamp.


I outlined one of the stamped circles with Prima Wire Thread in a shade called Cyan.  I glued it on with Aleene's Tacky glue.  I added a fabulous Mother Teresa quote from a stamp called, "Do Small Things With Great Love" and finished the whole thing off with a black Sharpie'd border.

Hope the colors are bright and the weather is perfect wherever you are this Saturday!

Sunday, March 22, 2015

Tutorials: One Stamp, Many Ways

This week's Simon Says Stamp Monday Challenge theme is, "One Stamp, Many Ways."  In my opinion, word block stamps (such as Tim Holtz's Individual stamp) are right up there in versatility.  Here are three easy ways I like to use word block stamps. 

Technique One: cut up the stamped words to create individual or "new" phrases.


This technique is as easy as it sounds.  Start by stamping the image:


Get out your scissors and get creative!  Cut up the stamped words to form all sorts of handy sentiments.  On my example card, I made the phrase, "Be You," and then glued it on top of a fabric scrap background and some colored wire in a circle shape.  Here are some other word combos I liked:


Making your own sentiments increases a stamp's usefulness...not to mention that it gives you a sense of sheer nerdy power to invent your own sentences!  Mwahhh-ha-ha!

Technique Two: turn your stamp into polka dots by cutting the stamped image out with circle punches after stamping.


To do this simple technique, start by stamping the image on plain paper, then get out your circle punches and punch out polka dot shapes.  Color the dots with Distress Ink and outline them with black Gesso or a black Sharpie, if desired.


Lay out the dots on your blank card until you get a pattern you like.  Remove them and build up your card background.  I painted and stenciled my background, then glued the dots on top.  This is an easy way to make great little circle embellishments!

Technique Three: turn your stamp into a background image.


Start by stamping the image multiple times onto white watercolor paper.  I rubbed different colors of Distress Ink on the stamp before stamping.


Next I used a sponge and smeared on some Distress Ink in corresponding colors:


I got out my Distress Paint and dabbed some liberal dots of it onto my background.


Bring on the water!  I spritzed the Distress paint, which caused it to bleed down my page.  With the water streaks still wet, I also drizzled on some watercolors.


I like how this technique lets the words peek out in some areas and makes them hazy in others.  It's a fun background for all sorts of projects.

Here are the supplies I used on these projects, which you can find at Simon Says Stamp:


I can't wait to see how many different ways you can use the same stamp!  Be sure to upload your creations to the Simon Says Stamp Monday Challenge Blog so that we can all be inspired and so that you can have a chance to win the always-wonderful $50 Simon Says Stamp store voucher!
http://www.simonsaysstamp.com/